Azure DevOps (VSTS) Token Creation (Step 2 – Configure the App)
 Updated
by
Er. Bahuguna Goyal
Updated
by
Er. Bahuguna Goyal
For VSTS (Azure DevOps) token: — as below.
In order to use the VSTS (Azure DevOps) app on Zendesk user need to create a token (password) for each user that user need to grant access to your VSTS (Azure DevOps) Account.
- Clicking on the User Icon button on your VSTS (Azure DevOps) account as shown below:
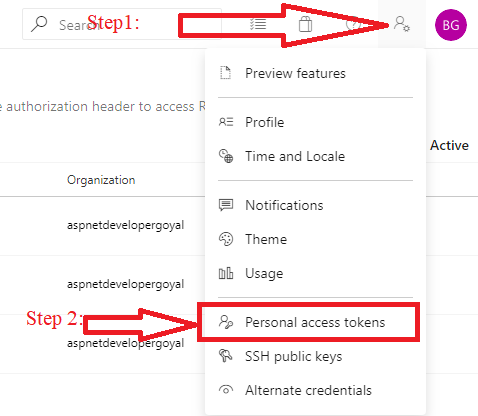
- User must navigate to the Personal Access Tokens menu.
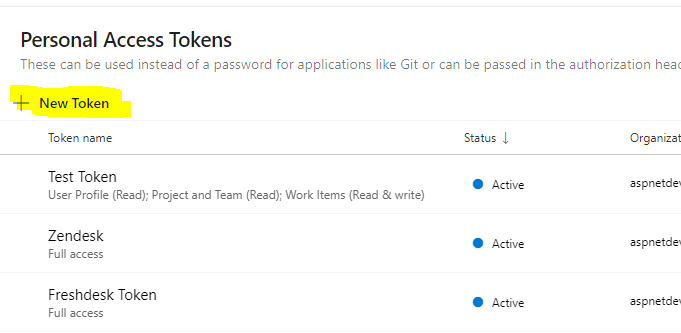
- Click on New Token button as show below:
- Next step is to set the token name, expiration time and the VSTS (Azure DevOps) account that the app will use to impersonate the access. Token name can be set whatever makes more sense to you. Is good to set the expiration date to something long, like a year, if you don’t wish to repeat the process very often.
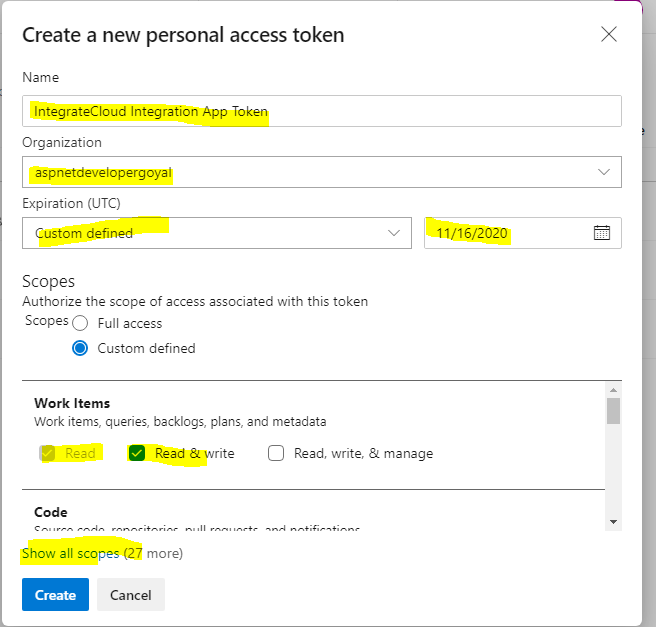
- Click on Show all scopes to display all the scopes.
- Finally User need to select the minimum scopes in order to make full use of the app. Select the following permissions:-
a. Project & Team ( Read only)
b. User Profile (Read Only)
c. Work Items (Read, Read & Write)
- Once you select the Permissions click on Create to create the token.
- Once the token has been created User need to save the token somewhere locally on computer in order to use it later during authorization inside the Integration App.
- Now you can use this token the Authenticate the token in VSTS (Azure DevOps) Apps for authentication.