Freshservice - Azure DevOps connector
 Updated
by
Kelly watts
Updated
by
Kelly watts
Freshservice Visual studio AzureDevops
Freshservice Integration — Visual Studio — AzureDevops
Connect your customer support software Freshservice and development teams using Visual Studio, VSTS, AzureDevops.
Installation Procedure for Freshservice Visual studio AzureDevops.
- Go on to your Admin page in Freshservice.
- Under Help-desk Productivity click on Apps.
- Click on “Get More Apps”. Search for “ Freshservice — Azure DevOps (VSTS) INTEGRATION” and click on Install to go to your app configuration page.
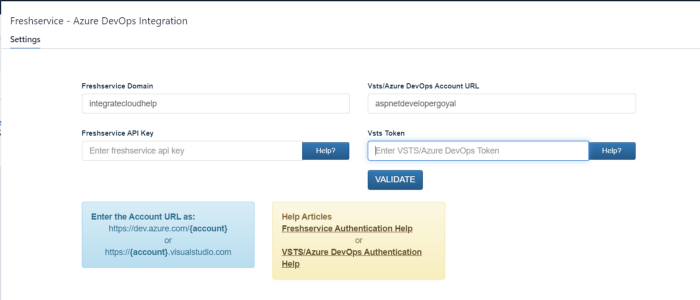
Freshservice and VSTS Credentials
For E.g.: — Freshservice Domain: — integratecloudhelp
Only the domain name can be Individual Name or users Company Name.
For Freshservice API Key: — As below.
- Login into your Freshservice Account.
Click on the Right side Icon — — — — -> Profile Settings.
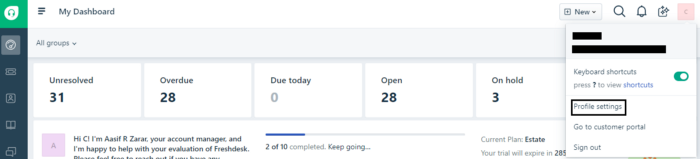
Freshservice Profile Setting.
- On the Right Side of the Page user can see “Your API Key”.

Freshservice API Key
That the Key user will use above to validate.
VSTS Account: — aspnetdevelopergoyal
Only the domain name can be Individual Name or users Company Name.
For VSTS Token: — As below.
In order to use the VSTS app on Freshservice user need to create a token password for each user that user need to grant access to your VSTS Account.
- Clicking on the personal access token button on your VSTS account
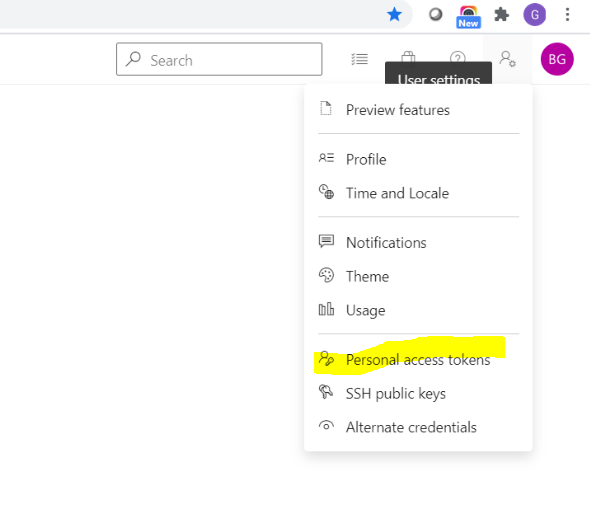
Redirecting to VSTS Security
- User must click on New Token button as show below:
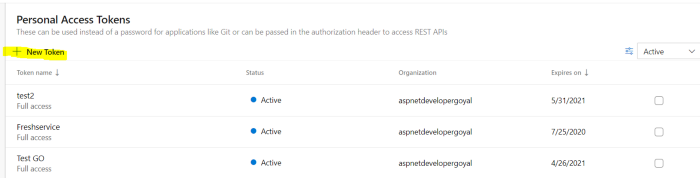
Re directing to Personal Access Tokens.
- . Next step is to set the token name, expiration time and the VSTS account that the app will use to impersonate the access. Token name can be set whatever makes more sense to you. Is good to set the expiration date to something long, like a year, if you don’t wish to repeat the process very often.
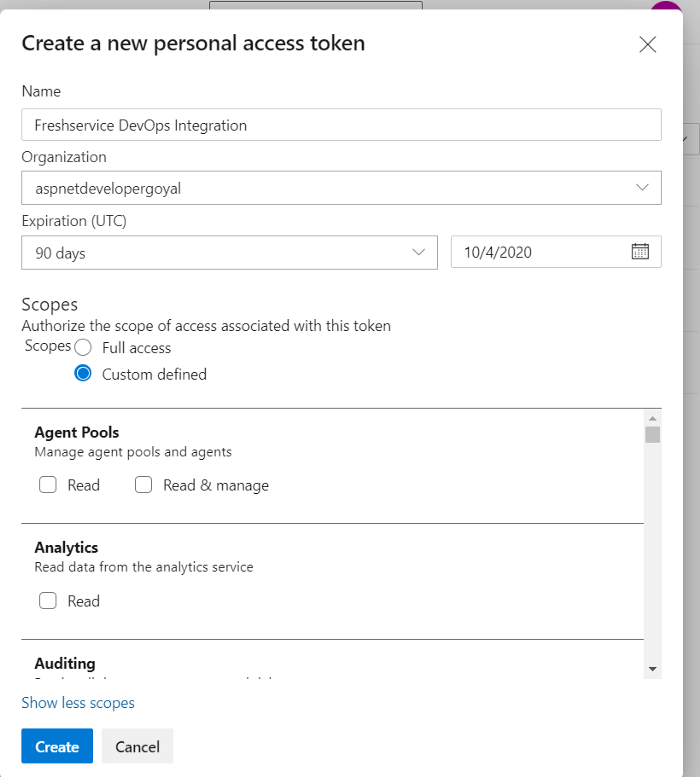
Creating a Personal Accesses Token.
- Finally User need to select the minimum scopes in order to make full use of the app. These are the Project and Team and Work Items.
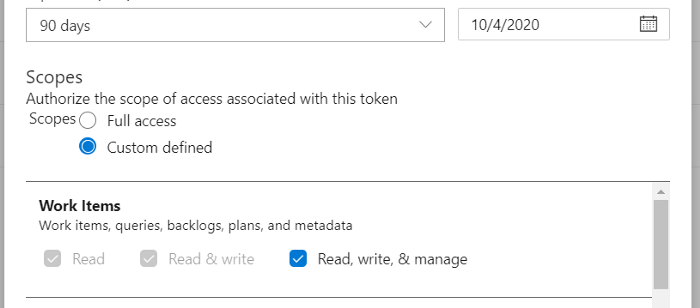

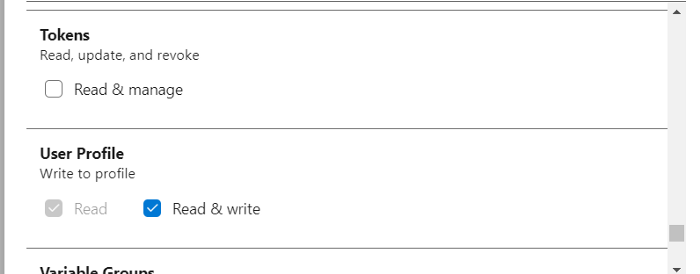
Selecting the Minimum Scopes to use of the App
Freshservice AzureDevops Visual studio connector (Connect Freshservice Visual studio AzureDevops)
Freshservice Visual studio AzureDevops
- Once the token has been created User need to save the password somewhere locally on computer in order to use it later during authorization inside the Freshservice App.
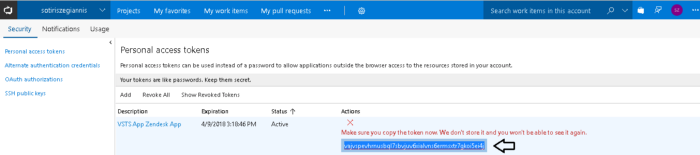
Displaying Token.
After Clicking on Validation if details are correct User will get message as “App validated successfully. Click on install to install the app.”
The Credentials user is going to use to validate in above step is going to be used. No further configurations will be required.
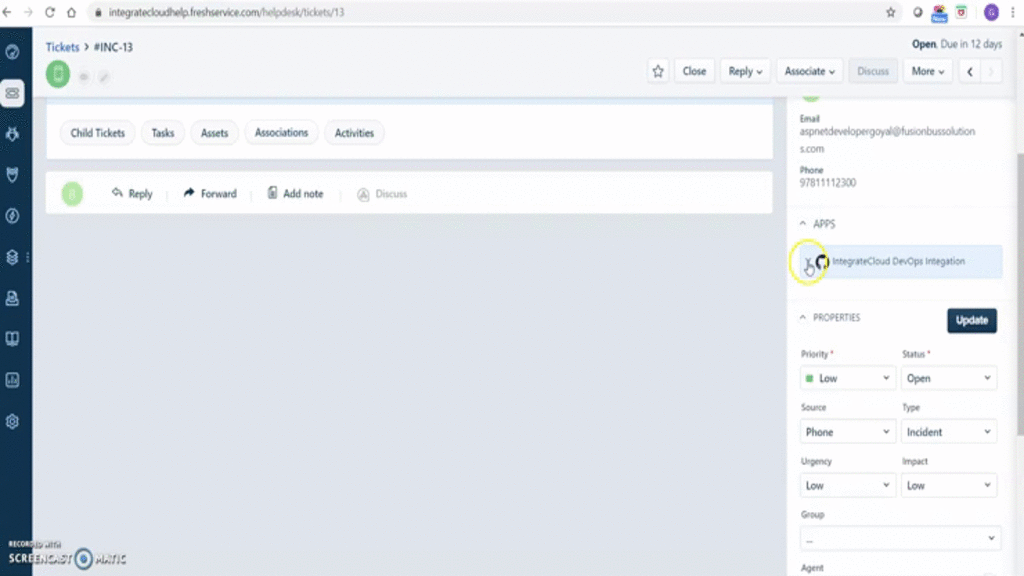
Step 6. After the installation is completed user will be able to see the Freshservice Visual studio AzureDevops.
Know How to Use Freshservice Visual studio AzureDevops:
Freshservice AzureDevops Visual studio connector (Connect Freshservice Visual studio AzureDevops)
Freshservice Visual studio AzureDevops
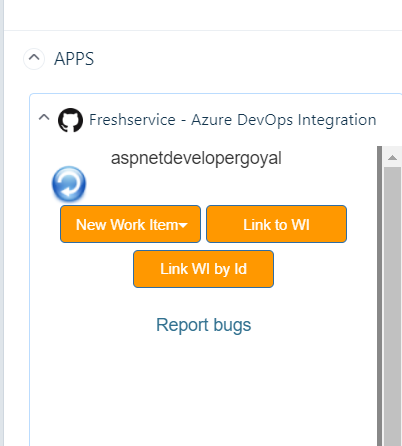
In the app we have 3 Options.
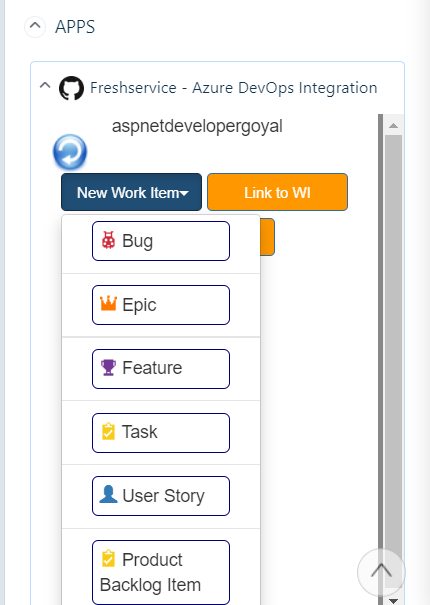
- New Work Items which contains Bug, Epic, Feature, Task and User Story.
- Link to Work Item.
- Notify.
Freshservice AzureDevops Visual Studio Integration
How to create Bug in VSTS/Azure DevOps from Freshservice.
- Click on Bug to create a new Bug in Freshservice Visual studio Azure DevOps.
Freshservice VSTS Bug Creation
- Add in all the necessary details like Project, Priority, Acceptance Criteria, Custom Fields (if required) etc.
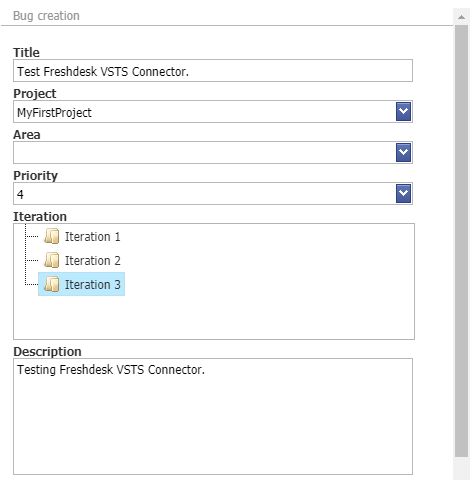
Adding Details for creating Bug
- After Clicking on Create Bug button User will receive a message “Work item has been created successfully”.
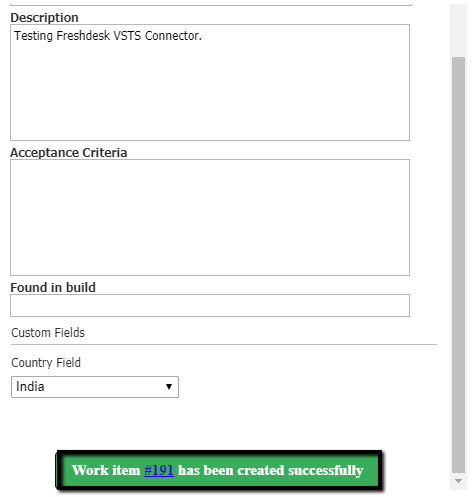
Bug Successfully Created
- As User Clicks on the Work Item Number User will be redirected to the Visual studio Azure DevOps Work Item Number.
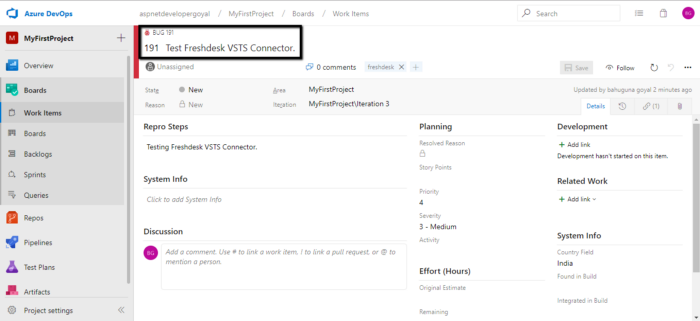
Bug in Azure DevOps
- In the same simple manner User can create Feature Epic & Task just by adding required info.
Link to Work Item.
- Users can link One Work Items.
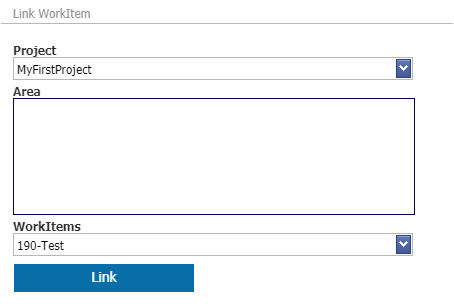
Link Work Item
- When User Clicks on Link button User will see below “Work item has linked successfully.”
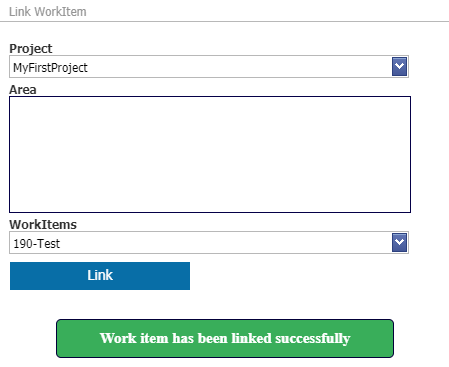
Work Item Linked Successfully
- Work Item can be seen linked in the App.
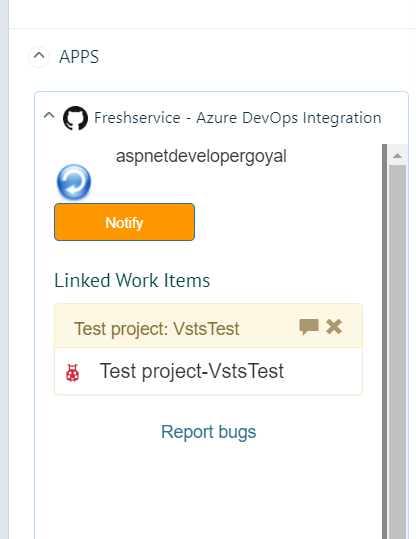
Work Items Link
Notify.
- User can Notify by using the Notify options in the App.
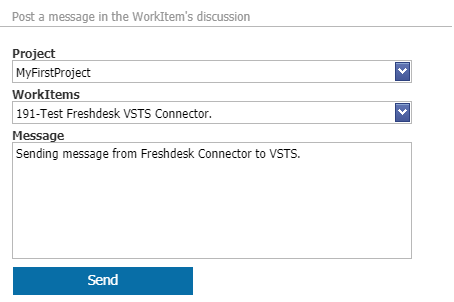
Notify from Freshservice to VSTS
- After User Click on Send User gets the following message below “Message has been posted successfully”
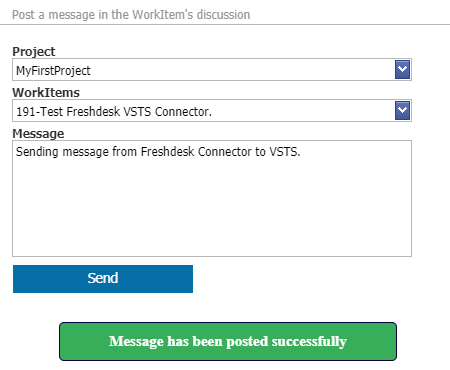
Message Posted Successfully
- Notification in AzureDevops from Freshservic App.
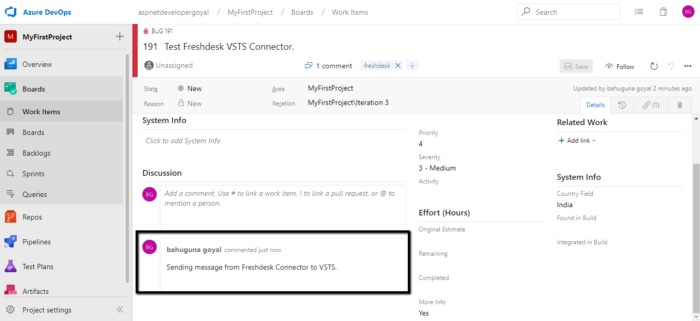
Notification in Azure DevOps
- Give your customer support team easy access to the information they need using the Show Work Item Comment History Icon.

Work Item Comment History
- See details about work items linked to a Freshservice ticket, including Current State, Area, Priority etc.
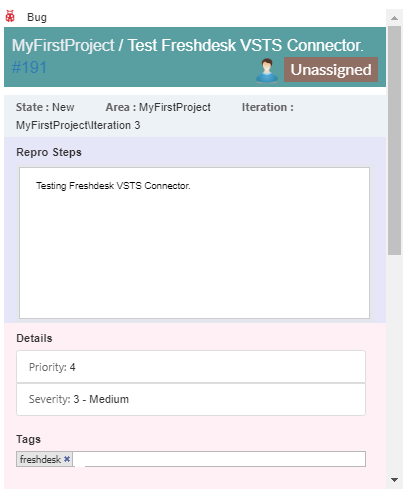
Comment Details
- To install the app please click on the following:
Freshservice AzureDevops Visual Studio Integration
Install from here
https://www.freshworks.com/apps/freshservice/freshservice_-_azure_devops_integration/
Use Freshservice Visual Studio Integration or Freshservice AzureDevops or Freshservice VSTS using IntegrateCloud connector. See the App in action.
Freshservice Visual studio AzureDevops
Freshservice Visual Studio AzureDevops